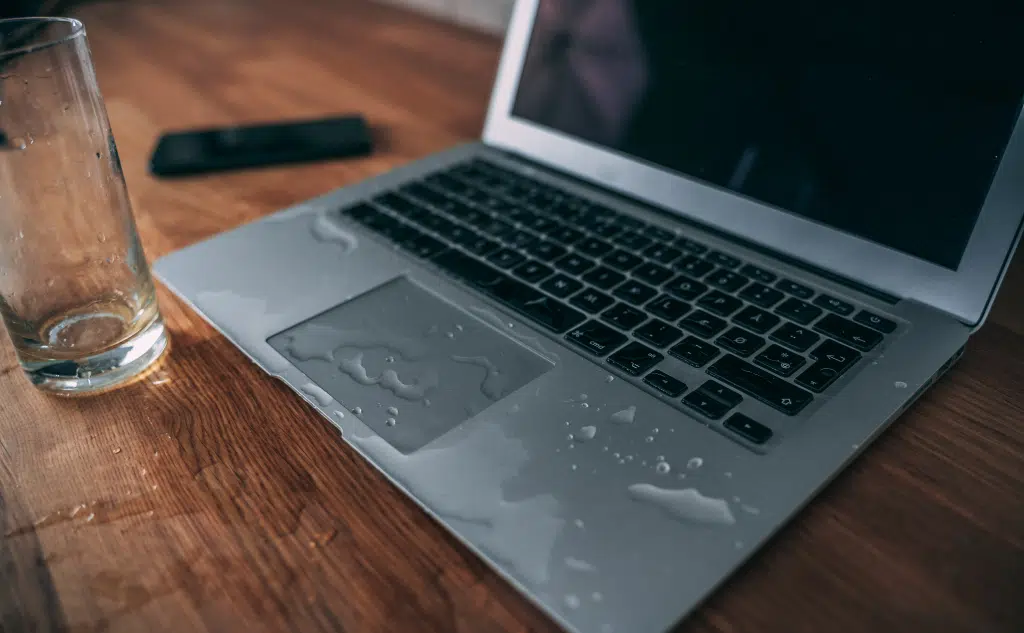
If you’ve accidentally spilled liquid on your laptop’s touchpad, don’t panic – this guide is here to help.
If you’re looking to navigate the tricky terrain of liquid damage, specifically targeting your laptop’s trackpad/touchpad, then you’ve landed on the right page.
Let’s dive right in!
What Should You Do First When Liquid Gets on Your Laptop Touchpad? (4 Steps)

Let’s drive this essential point home.
Immediately power down your computer.
If you spill a liquid on your laptop, turn it off and unplug it from power as quickly as you reasonably can.
It usually takes time for water to damage a laptop, and there is a fair chance that you can turn it off before that happens.
After the computer is off, leave it off until you can address the spill thoroughly.
Should these initial strategies prove unsuccessful, a range of further steps can be pursued to rectify any incurred damage.
#1 Turn Off Your Laptop

Promptly power down and disconnect your laptop from any power sources.
This cannot be stressed enough – it’s the most critical action to take.
Liquids can lead to short circuits that harm your laptop’s intricate systems, but only if electricity is present.
Don’t concern yourself with a formal shutdown process.
Disconnect your laptop rapidly if it’s plugged in and press the power button until it completely shuts down.
If your laptop is equipped with a detachable battery, remove it as soon as the laptop is powered down.
When water or other fluids seep into the laptop’s circuits, the conductive elements present in these liquids, commonly referred to as electrolytes, can disrupt the electrical pathways.
Essentially, the electricity could bypass the wiring and instead flow through the liquid.
This unintended flow of electricity can result in scenarios where the current travels in undesired directions, damaging the intricate, sensitive circuits within the computer.
However, this can only transpire if there’s a power source available to the laptop.
If no current flows, it can’t be misdirected and inflict damage.
This is the paramount concern when a laptop suffers a fluid spill, and promptly cutting off the power is your primary line of defense.
Occasionally, liquid penetrates the circuitry so quickly that damage becomes unavoidable. However, laptops are built for regular usage, and their electronic components aren’t easily accessible.
Typically, it takes a while for the liquid to infiltrate the laptop’s protective shell and reach the circuitry.
You may not be able to prevent the liquid from seeping in, but you can power down the laptop before it causes any damage.
As we proceed, we’ll also discuss other potential issues resulting from a spill, but remember, powering down your laptop is by far the most immediate and vital step to take.
#2 Let Your Laptop Dry
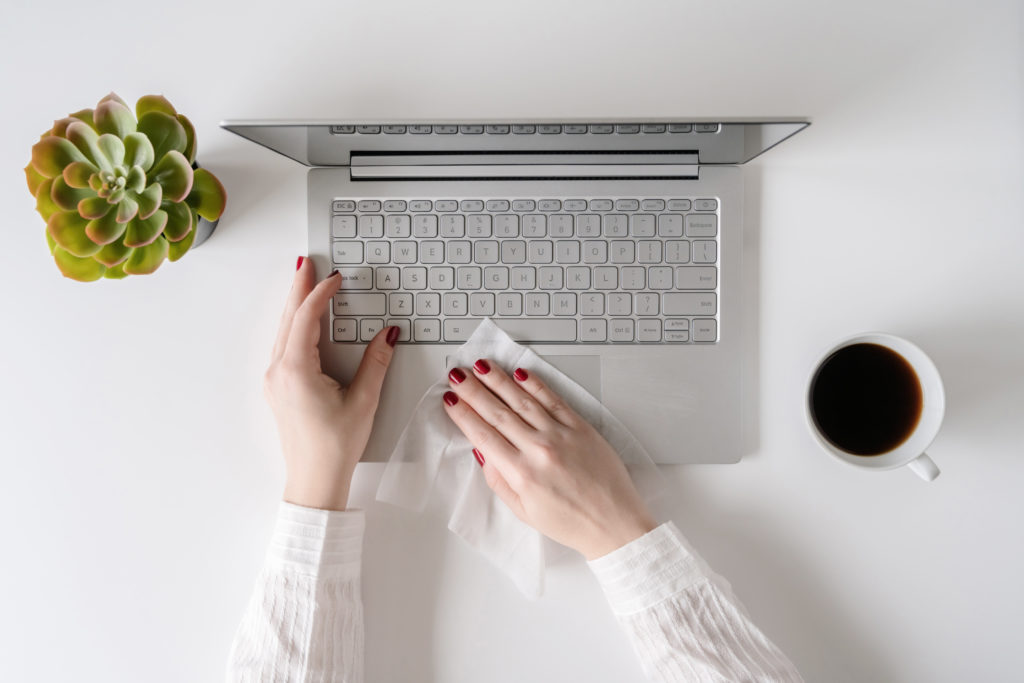
Your primary focus should now be to let it dry. If there is any liquid residue, definitely wipe it down with a paper towel or cloth.
Now, let’s talk about drying. There’s no need for any hocus-pocus here, and please, resist the temptation to bury your laptop in rice. It’s a myth that it helps; in fact, it could introduce new foreign particles into your device.
The best course of action is to leave your laptop in a low-humidity area, allowing it to air-dry naturally for a couple of days. If you’re confident enough, opening up the laptop shell could expedite the drying process.
Here’s a pro tip: position your laptop like a teepee and stand it up to drain any residual liquid. This trick helps to keep the liquid away from the logic board.
Feel free to use a fan to circulate air around your laptop, especially if humidity is a concern. But remember, it’s not a race.
Time is your best ally in this situation. And one more thing, avoid using cold air as it could cause condensation, defeating your drying efforts.
#3 If the Spill Wasn’t Water
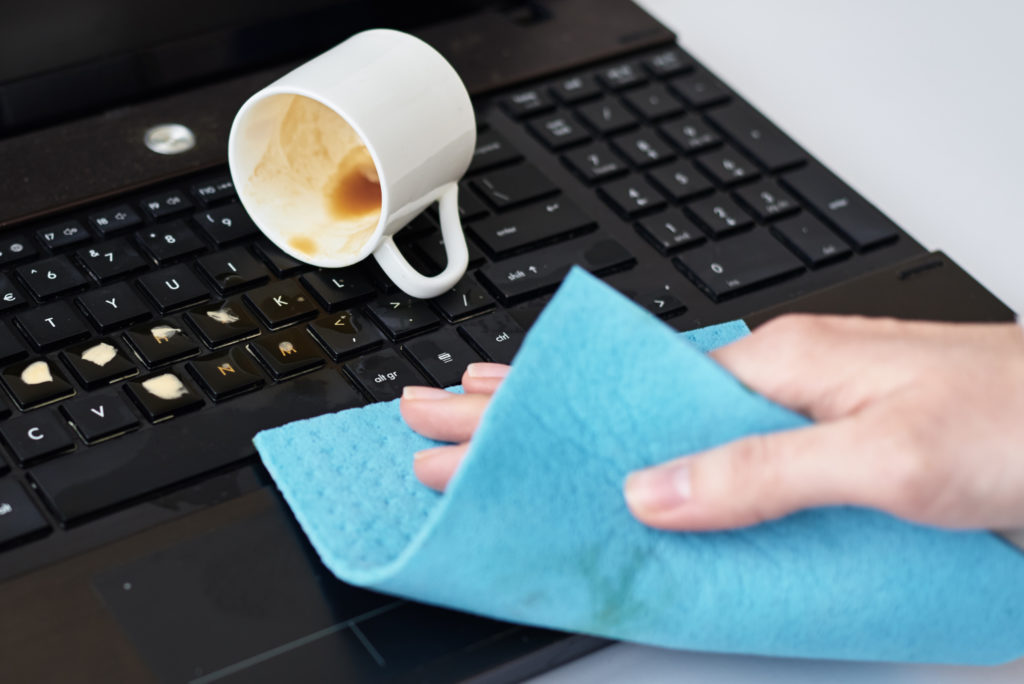
Did you spill something that could leave a residue as it dries? This is where things get a bit tricky. We’re looking at spills like hard water or any sugary drinks. Sugar doesn’t evaporate, leaving a sticky residue that’s a real electronics nightmare.
The good news is, as long as your laptop remains powered off, most liquids won’t cause permanent damage. This gives you the chance to get your laptop all cleaned up.
Cleaning a laptop can be straightforward or slightly challenging, depending on the situation. Here’s how you can tackle it:
Starting with the outer shell, most laptops typically have plastic or aluminum shells which aren’t too hard to clean. Instead of a damp cloth, use a toothbrush lightly dipped in 99% isopropyl alcohol. The high concentration of alcohol is crucial because it evaporates quickly without leaving a residue, unlike lower concentrations. It’s also great for dissolving that stubborn sticky mess. Once you’re done, let the device dry thoroughly.
Now, let’s address the screen, often an innocent victim of spillage. Clean it using a microfiber cloth and a streak-free screen-cleaning solution. It might take a few rounds to get it completely clean, but be patient and gentle – too much pressure can damage the screen.
Got sticky keys? They can be removed and cleaned individually using the same toothbrush and isopropyl alcohol combo. Ensure they’re completely dry before returning them to their rightful places on the keyboard.
If the stickiness has infiltrated beneath the keys, you’re in for a bit of a challenge. Keyboards vary in design, and cleaning beneath the keys is a delicate task. If you’re not confident, it’s best to call in a pro. Bad cleaning practices can cause damage to the electrical components, especially in membrane keyboards.
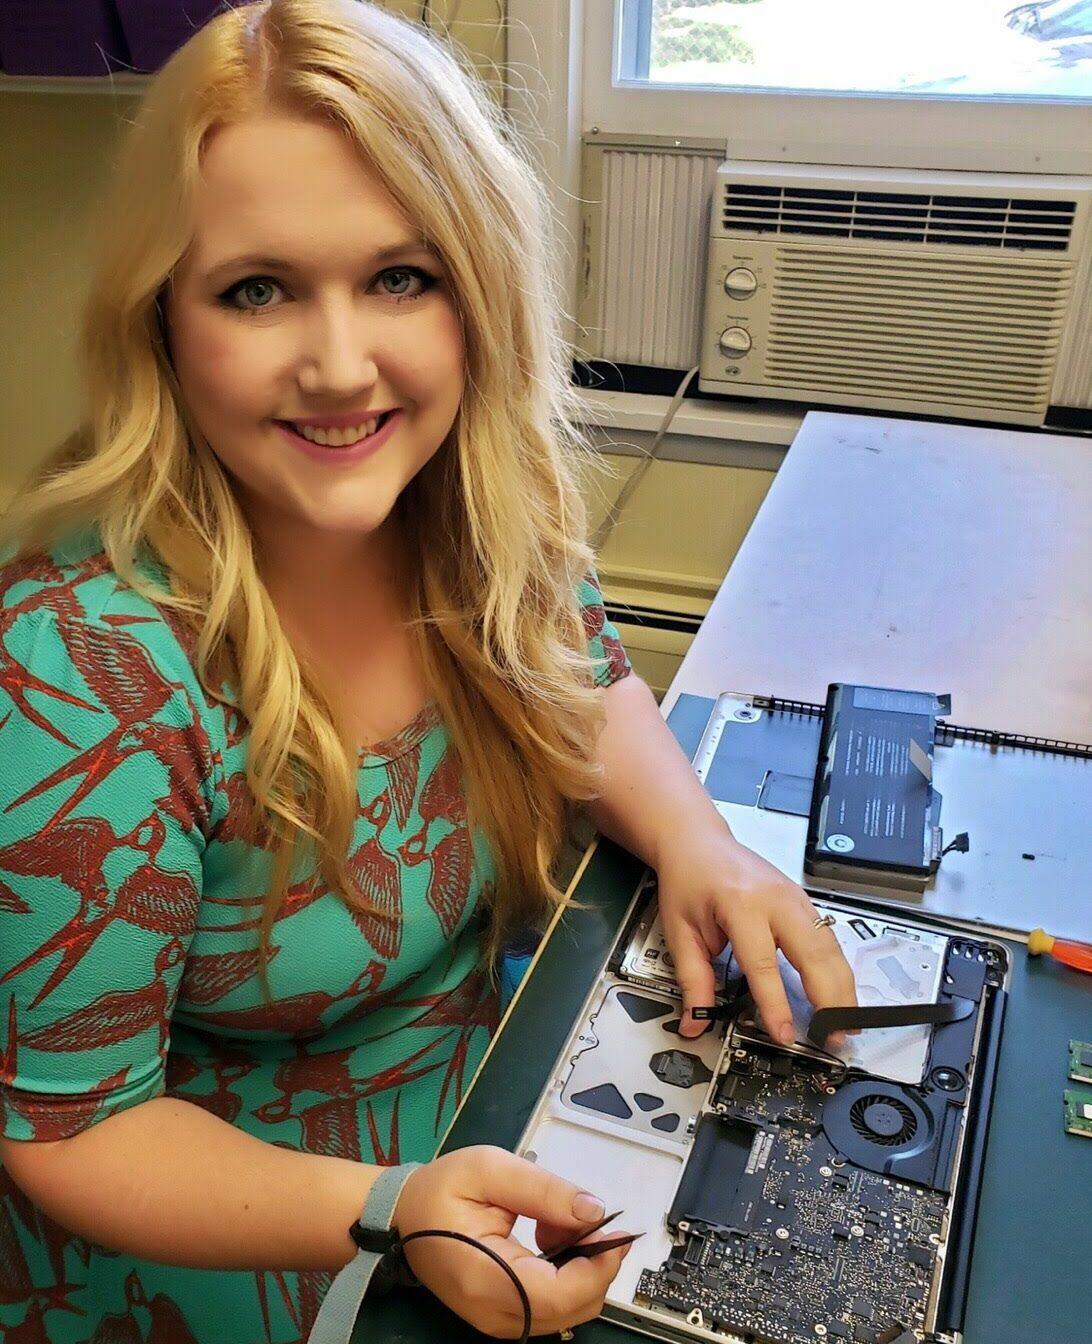
The same rule applies to the other internal components. Laptop innards are filled with delicate, small parts that can’t be wiped clean with a cloth. Precision tools and a careful hand are required here, and it’s best left to an experienced individual.
However, if you’re feeling adventurous (and the risk of a DIY laptop clean-up doesn’t deter you), you can find some tutorials online and try it yourself. Just remember, cleaning the insides of a laptop is a risky business and can easily cause more harm than good.
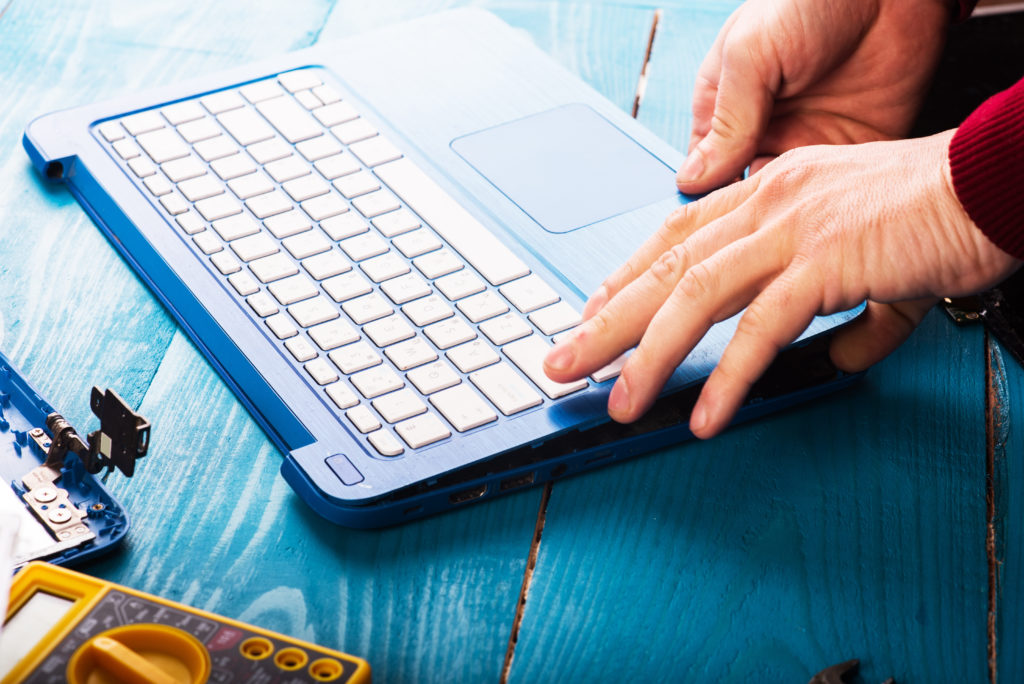
#4 Test Your Laptop

When everything is clean and dry (you really need to let it dry for more than a day to be sure), then you can test the laptop.
It’s the moment of truth and how you find out if your efforts saved the device.
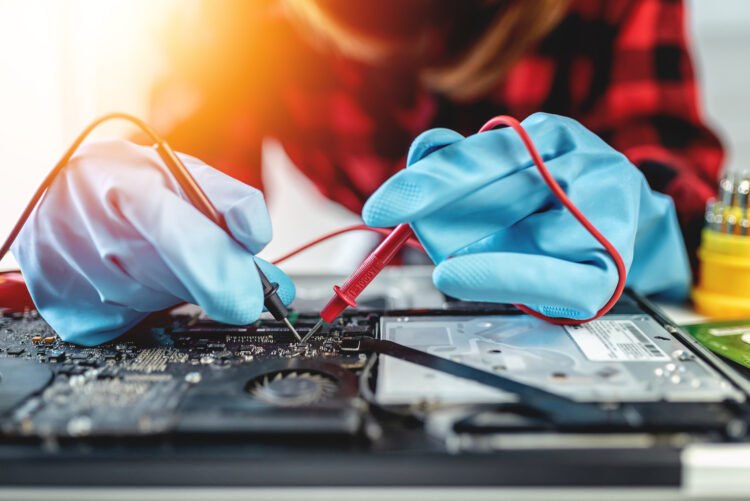
If possible, you want to test the device with a circuit tester or multimeter before you plug it in and turn it on.
This method allows you to identify problems with the laptop without pumping a bunch of destructive electricity through the device.
If you don’t have the time, tools, or knowledge to do that, you can turn on the laptop and hope for the best. If it works, congratulations!
Your quick action and patient care saved the computer. If it doesn’t work, keep reading.
What If the Laptop Doesn’t Work After a Spill on the Touchpad? (4 Things)

Despite your best efforts, the spill causes problems with your laptop.
Before we jump into troubleshooting and dealing with issues, it’s important to note that not all problems are the same.
A spill can prevent a laptop from turning on.
It can damage other parts like the screen, keyboard, speakers, trackpad, and more.
So, your computer might turn on just fine but ultimately still have problems that need to be addressed.
#1 Troubleshooting
Troubleshooting a laptop after a spill can be difficult, especially if the device doesn’t turn on.
If it does turn on and just has a specific problem, like the keyboard not working, then things are a little more obvious.
Replace the part that no longer works.
Regardless, troubleshooting is a matter of going through the individual components of the computer to test the circuits.
A multimeter with a load tester can handle a lot of it.
You can also get specialized circuit testers for computers.
They have plug attachments that are designed to work with standard configurations in laptops.
The point of testing is to find places where power can’t flow the way it is supposed to.
So, you start with the power supply and follow the circuits from there.
You will test across the main regions of the motherboard until you find every point where there are problems.
If this sounds like too much, you can take the computer to a repair shop.
That’s perfectly fine. For the most part, this is what the technicians will be doing.
#2 Cleaning

You read about cleaning up above, but it’s important to understand that it is often a part of the repair process.
Without thorough cleaning, a laptop cannot be repaired.
Naturally, this depends on what was spilled, but unless it was clean water, there are going to be residues left behind.
You can follow the steps in the previous section that discusses cleaning, or you can hand this project off to someone with experience.
#3 Replacing Parts
Once troubleshooting and cleaning are complete, you should have a list of damages.
The standard procedure is to replace any and all damaged parts.
Once you do, the laptop should be working again.
Some parts, when replaced, will require you to reinstall your operating system.
As long as the hard drive wasn’t damaged, you can back it up before any reinstallation.
This requires a second computer and a device that allows you to connect the laptop hard drive (hard drive enclosures are the most commonly used tool).
When the laptop hard drive is connected to another computer, you can use the functioning computer to make your backup (or a technician can do all of this).
For many components, it’s possible to repair them rather than replace them, but it often requires micro-soldering.
That’s a rather advanced skill.
If you know how to micro-solder, you probably don’t need this tutorial.
In fact, micro soldering is so advanced that many computer repair shops don’t offer it as a service.
#4 Replacing the Laptop
If the damage is extensive enough, it might prove more reasonable to replace the laptop as a whole.
Typically, if you have to replace more than two major components, the total cost of repair is going to rival the cost of a new laptop.
Using the techniques mentioned above, you can still save data from the damaged laptop, as long as the hard drive was not destroyed by the spill.