
Locate “where is the microphone on iPhone” swiftly with our expert guide. From the original iPhone to the latest model, we’ll show you exactly where Apple has placed the microphones to support your calls, recordings, and Siri interactions. No fluff, just the facts you need.
Key Takeaways
iPhones have evolved from a single microphone in the original model to multiple microphones in current models like the iPhone 12 Mini and iPhone 14 Pro, enhancing audio quality and user experience.
The primary and secondary microphones on iPhones have different positions in the various models, which include the bottom edge, top edge, and near the camera, providing clear audio for calls, recordings, and noise cancellation.
Users can troubleshoot iPhone microphone issues by cleaning obstructions, adjusting software settings, or seeking professional repairs for hardware issues; optimizing microphone performance is also possible with proper handling and using external microphones when necessary.
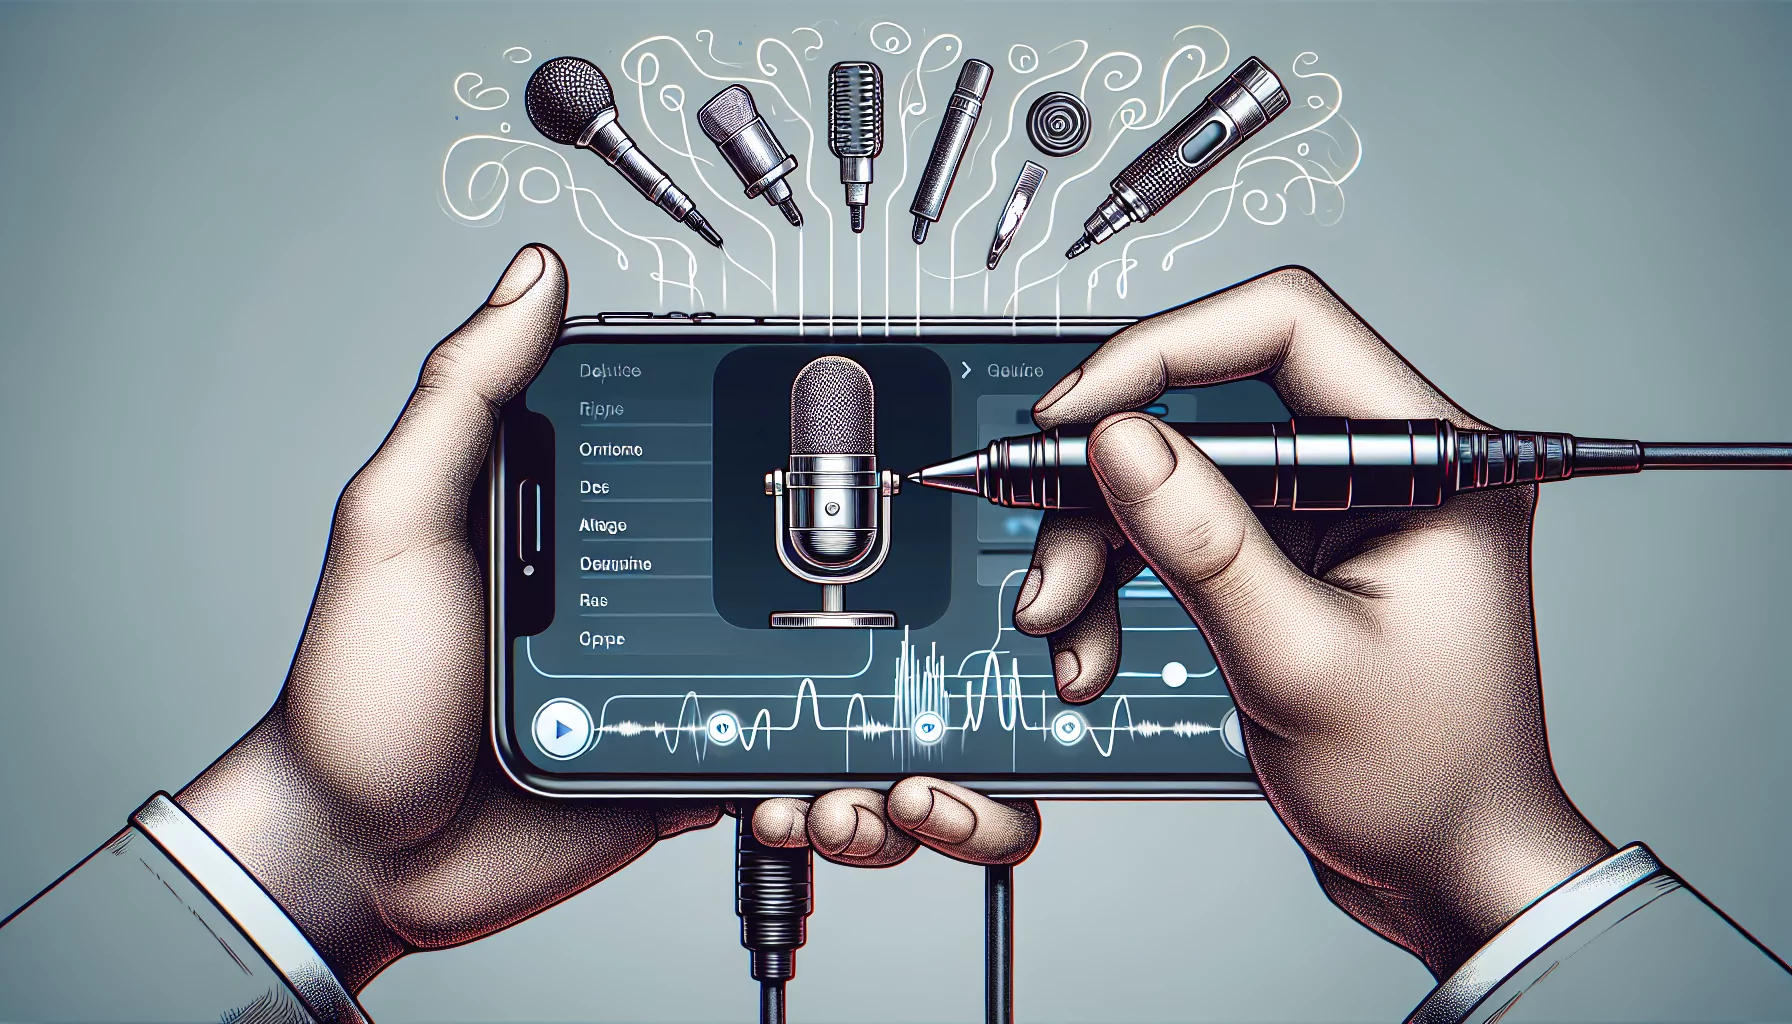
Understanding where is the microphone on iPhones?
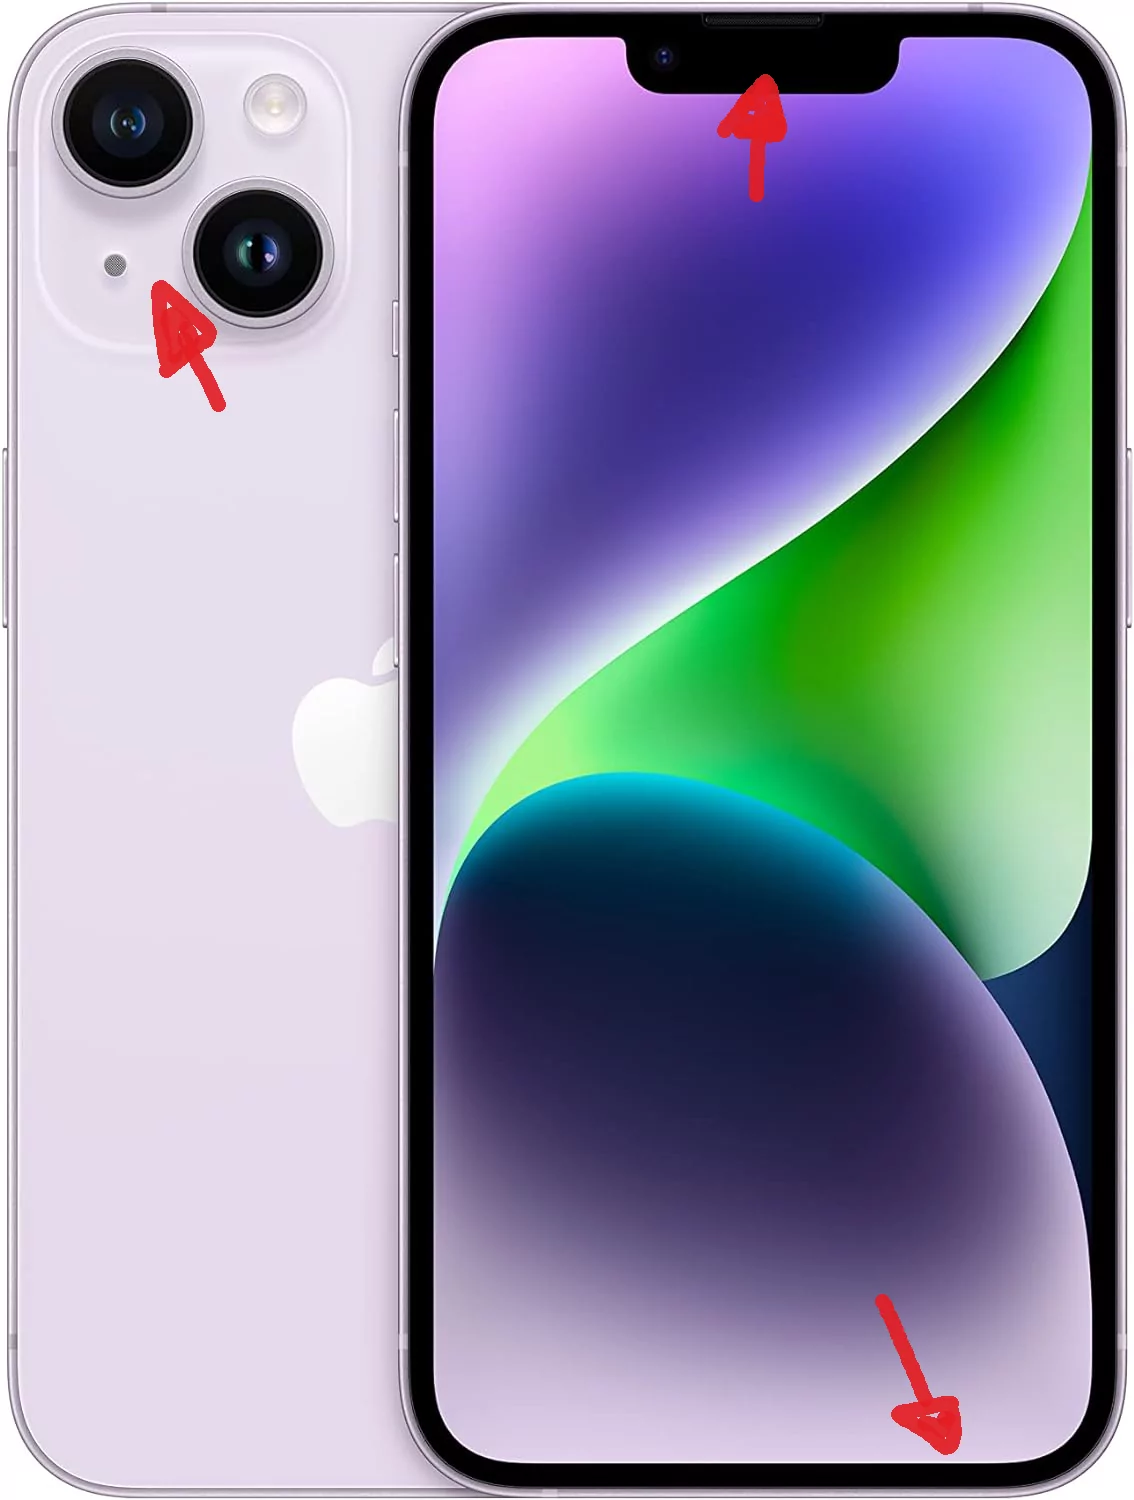
Knowing the exact location of the microphones on your iPhone is crucial. It not only helps optimize microphone performance but also ensures clear and high-quality audio in various situations. The primary microphone, typically found to the left of the lightning port, is your go-to microphone for calls and voice recordings.
Interestingly, different iPhone models have slightly varied placements. For instance, the iPhone SE model A1662 has its main microphone between the back camera and the flashlight, with a secondary microphone to the left of the charging jack. The latest iPhone 15 boasts two microphones at the bottom, one in the earpiece, and another on the back camera assembly.
Primary Microphone on iPhones
The primary microphone serves as the iPhone’s main audio receiver, while the rear microphone enhances audio capture during video recordings. On the latest iPhone models, such as the iPhone 14 Plus, the primary microphone is strategically positioned near the bottom edge or charging port, ensuring clear audio during calls and voice commands.
The primary microphone on the iPhone 11 is located at the bottom edge, specifically to the left of the charging port. This design is consistent with other iPhone models. This optimal positioning allows the iPhone to deliver high-quality voice recordings, enhancing the overall user experience.
Secondary Microphones on iPhones
The secondary microphones on iPhones serve a very different purpose. They play a crucial role in noise cancellation and stereo recording, ensuring that your audio is as clear and balanced as possible.
Take the iPhone XR, for example. The secondary microphone is conveniently located between the lens and the flash. Similarly, the iPhone 11 features secondary microphones at the top edge and near the rear camera setup, ensuring optimal sound capture from different directions.
iPhone Microphone Evolution: From Single to Multiple Mics

The evolution of iPhone microphones over the years has significantly enhanced the device’s audio capabilities. Moving from a single microphone in early models to multiple ones in the latest versions, Apple has continually improved the user experience.
It’s fascinating to note that the iPhone 5 was one of the earlier models to feature more than a single microphone, coming equipped with three. Meanwhile, current iPhone models, like the iPhone 12 Mini and the iPhone 14 Pro, boast four microphones each. These extra microphones are beneficial for multiple audio-based functions including noise cancellation and spatial audio recording. This transition clearly showcases Apple’s commitment to improving the audio quality and versatility of its smartphones.
Early iPhone Models: One Microphone
The original iPhone, launched in 2007, featured a single microphone. This trend continued with the iPhone 3G and the iPhone 3GS, both of which also had a single microphone design.
However, these early models often encountered audio issues. The iPhone 3G, in particular, faced numerous microphone-related problems that required frequent replacements. This necessitated a shift towards more advanced microphone configurations in subsequent models.
Transition to Dual Microphones
The introduction of dual microphones in the iPhone 4 marked a significant evolution in iPhone’s microphone technology.
One microphone was used for speaking
The other was dedicated to noise cancellation.
The second microphone was also utilized for sound input during video recording, thereby improving audio quality.
This transition to dual microphones significantly enhanced the user’s experience, particularly by improving phone call clarity and audio quality during video recordings.
Current iPhone Models: Four Microphones
The latest iPhone models go a step further by incorporating four microphones. For instance, the iPhone 14, iPhone 14 Pro Max, and the third-generation iPhone SE are all equipped with four microphones.
On the iPhone 12 Pro Max, two microphones are located at the bottom, with the others positioned in the earpiece and in the rear camera assembly. These strategically placed microphones ensure clearer call quality and improved audio capture in various environments, providing an enhanced user experience.
How iPhone Microphones Enhance User Experience
The strategic microphone placement of iPhone microphones contributes significantly to the device’s audio quality, enhancing user experience across various functions. Whether it’s a simple phone call, an interaction with Siri, or a high-definition video recording, the precise microphone arrangement ensures clear audio quality.
These advanced features come into play in various scenarios, such as interacting with Siri or making a video call. The specific placement of microphones allows the iPhone to efficiently handle different use-cases, providing a seamless user experience.
Improved Phone Calls and Voice Commands
The dual microphone setup and the Voice Isolation feature have played a significant role in improving phone call clarity and voice command accuracy. By reducing background noise, echo, and room tone, the Voice Isolation feature simulates the effect of the speaker being nearer to the microphone, resulting in more accurate voice commands.
This evolution in microphone technology has enhanced the user experience, making communication clearer and interaction with the device smoother and more intuitive.
Enhanced Audio Quality for Video Recordings
When it comes to video recordings, the strategic location of microphones on iPhone models is specifically designed to optimize sound capture and minimize feedback. The presence of multiple microphones allows for the capture of clear audio from various directions, enhancing the overall sound quality.
To maintain high audio quality during video recordings, it’s crucial to keep the iPhone’s microphones, especially the bottom one, free from any obstructions. These multi-microphone systems are a critical feature for content creators, enabling them to produce media with high-quality audio capture.
Noise Cancellation Feature
The iPhone incorporates secondary microphones for noise cancellation during phone calls and voice commands, resulting in clearer sound. The iPhone’s noise cancellation feature employs a secondary microphone to detect ambient noise and cancel it out, delivering a clearer voice during calls.
Moreover, iPhones include a Voice Isolation feature that processes audio to minimize background noise during calls, enhancing the clarity of the user’s voice. This feature significantly enhances the user’s experience, ensuring that their voice is heard clearly and accurately.
Troubleshooting Common iPhone Microphone Issues
Despite the advanced technology, iPhone microphones are not immune to issues. Troubleshooting an iPhone microphone includes methods to test individual microphones for functionality. This can be done by recording voice memos or videos to test and confirm if the primary, front, or back microphones are working.
However, some issues may not be immediately noticeable or easy to resolve. They might require further investigation, especially when dealing with blocked or dirty microphones, or software and hardware-related problems.
Blocked or Dirty Microphones
One of the most common causes of poor audio quality is blocked or dirty microphones. To ensure that iPhone microphones are not obstructed, it’s important to inspect the bottom, front, and back microphone openings for any obstructions.
Cleaning iPhone microphones can be done using a cotton swab or a soft-bristled brush, such as a soft-bristled paintbrush, to gently dislodge debris from the microphone grilles. Additionally, it’s important to keep the iPhone’s microphones free from obstructions, including removing any cases, screen protectors, or films that might cover the microphones.
Software-related Microphone Issues
Software-related microphone issues can often be resolved by updating iOS, restarting the iPhone, or adjusting app permissions. iOS updates can sometimes lead to microphone malfunctions, but subsequent updates often contain fixes that resolve these issues.
Remember, each app requires certain permissions to access the microphone. Therefore, ensuring that apps have the necessary permissions to access the microphone can resolve issues specific to app-related microphone functionality.
Hardware-related Microphone Issues
If troubleshooting steps fail to resolve microphone issues, it may indicate a hardware problem that could necessitate professional assistance or replacement. It’s recommended to contact Apple support or visit an Apple store for potential hardware servicing if the microphone problem persists after software troubleshooting attempts.
Remember, professional assistance should be sought if the microphone issues are not resolved through cleaning and settings adjustments. The key is not to attempt any DIY solutions that might further damage the device.
Tips for Optimizing iPhone Microphone Performance
Optimizing iPhone microphone performance involves:
Knowing where the microphones are located
Proper phone handling
Adjusting microphone settings in apps
Using external microphones when necessary
These simple yet effective tips can greatly enhance audio quality, whether you’re on a call, interacting with Siri, or recording videos to capture audio during a video recording.
Proper Phone Handling During Calls and Recordings
The way you handle your phone during calls and recordings can significantly impact the audio quality. To ensure clear call quality and avoid muffling the microphone, users should avoid covering the iPhone with their hands or fingers during calls.
Ensuring microphones are clear of obstructions, such as fingers or accessories, can prevent sound issues during calls and recordings. Also, for optimal audio recording, it’s suggested to point the primary microphone directly at the sound source without obstructions.
Adjusting Microphone Settings in Apps
Adjusting microphone settings in apps can significantly enhance the audio quality during calls and recordings. For instance, during a call, iPhone users can access the Voice Isolation feature by opening the Control Center to optimize audio quality.
Similarly, the ‘Enhance Recording’ feature in the Voice Memos app can be used to reduce background noise and echoing, thereby enhancing the quality of audio recordings. These settings adjustments can make a noticeable difference in the audio quality.
Using External Microphones
For situations that require superior audio quality, using an external microphone with an iPhone is a great option, especially for content creators. External microphones can greatly improve sound capture, surpassing the limitations of built-in hardware.
Whether you’re recording a podcast, a YouTube video, or simply need clearer audio for a video call, an external microphone can be a game-changer. They are easy to attach and can provide professional-grade audio quality.
Summary
In conclusion, understanding the location and functions of iPhone microphones is critical for optimizing audio quality. From the single microphone in early models to the advanced four-microphone setup in the current models, iPhone microphones have evolved significantly over the years. By properly handling the phone, adjusting microphone settings, and using external microphones when necessary, you can enhance your iPhone’s audio performance. Remember, even with advanced technology, issues may arise. When they do, knowing how to troubleshoot common issues can save you time and frustration. So, keep these tips handy and make the most of your iPhone’s audio capabilities.
Frequently Asked Questions
Where is the primary microphone located on most iPhones?
The primary microphone on most iPhones is located near the bottom edge or the charging port. It helps capture sound during calls and recordings.
How have iPhone microphones evolved over the years?
iPhone microphones have evolved from a single microphone in early models to multiple microphones in the latest models, enhancing audio capabilities and user experience. This improvement has significantly enhanced the audio quality of iPhone recordings and calls.
What are the benefits of having multiple microphones on iPhones?
Having multiple microphones on iPhones offers clearer call quality, improved audio capture in different environments, and an overall enhanced user experience. This can greatly improve the sound quality of your recordings.
What are some common iPhone microphone issues and how can I troubleshoot them?
To troubleshoot common iPhone microphone issues, you can try cleaning the microphones, updating iOS, restarting the iPhone, adjusting app permissions, or seeking professional assistance.
How can I optimize my iPhone’s microphone performance?
To optimize your iPhone’s microphone performance, handle the phone properly during calls and recordings, adjust microphone settings in apps, and use external microphones when needed.